Mastering Cura Slicer: Unlock 400+ Settings for Perfect Prints
In the dynamic world of additive manufacturing, achieving flawless 3D prints isn't just about having a great 3D printer; it's equally about the software that prepares your digital models for physical creation. This is where **Cura Slicer** shines as an undisputed leader. Developed by Ultimaker, this powerful, open-source 3D printing software acts as the critical bridge between your design vision and its tangible reality. While known for its user-friendly interface, Cura's true depth lies within its staggering array of over 400 customizable settings, offering unparalleled control for anyone seeking to master their 3D printing output. Whether you're a hobbyist eager to bring intricate designs to life, an educator inspiring the next generation of makers, or a professional demanding precision, understanding and leveraging Cura's extensive configuration options is the key to unlocking perfect prints. This comprehensive guide will delve into the intricacies of **Cura Slicer**, exploring its fundamental role, demystifying its vast settings, and providing actionable insights to elevate your 3D printing journey from good to exceptional.What is Cura Slicer and Why is it Indispensable?
At its core, **Cura Slicer** is a sophisticated piece of software designed to translate a 3D model file—typically in formats like STL, OBJ, or 3MF—into a set of instructions known as G-code. Imagine your 3D printer as an orchestra and Cura as its conductor. The G-code is the musical score, precisely dictating every movement: where the print head should move, how much material to extrude, and at what temperature. Without a slicer, your 3D printer wouldn't know how to transform a digital model into a physical object. Cura’s importance stems from several key factors: * **Open-Source and Free:** Its accessibility makes it a global standard, welcoming users of all backgrounds without a cost barrier. * **Ultimaker's Legacy:** Backed by UltiMaker, a pioneer in 3D printing, Cura benefits from continuous research, development, and a commitment to innovation. * **Universal Compatibility:** Crucially, Cura isn't limited to UltiMaker-branded printers. Its robust compatibility extends to a vast range of 3D printers, making it a versatile tool for almost any setup. * **Intuitive Yet Powerful:** It strikes a delicate balance, offering a "Recommended Mode" for quick, reliable prints, while simultaneously providing an "Custom Mode" that unlocks its full, intricate potential. A slicer like Cura is not just about converting files; it calculates a precise 3D printing strategy to faithfully reproduce your model. This includes generating internal infill patterns for strength, creating support structures for complex overhangs, and optimizing print paths for efficiency and quality. This deep functionality makes **Cura Slicer** an essential free tool for 3D printing success, guiding your printer layer by layer to construct the physical object with remarkable accuracy. If you're looking to understand more about its foundational benefits, check out our related article: Cura Slicer: The Essential Free Tool for 3D Printing Success.The Power Behind the Prints: Understanding Cura's 400+ Settings
The true mastery of **Cura Slicer** comes from navigating and understanding its extensive "Custom Mode," which unveils over 400 settings. These settings allow you to fine-tune every aspect of your print, dictating speed, quality, material properties, and structural integrity. Instead of being overwhelmed, think of these settings as levers you can pull to perfectly tailor your print to your specific needs and the unique characteristics of your printer and filament. Let's explore some of the most impactful categories of settings you’ll encounter:Quality Settings
- Layer Height: Perhaps the most fundamental setting. Smaller layer heights (e.g., 0.1mm) result in finer detail and smoother surfaces but increase print time. Larger layer heights (e.g., 0.3mm) print faster but show more pronounced layers.
- Line Width: Defines the width of the extruded plastic lines. Adjusting this can improve wall strength and adhesion.
- Initial Layer Height: Often printed thicker or slower to ensure excellent bed adhesion.
Tip: For aesthetic parts, prioritize low layer heights. For functional prototypes where speed is key, increase it.
Shell Settings
- Wall Thickness/Wall Line Count: Determines the number of perimeters around the object. More walls mean stronger parts.
- Top/Bottom Layers: Defines the number of solid layers on the top and bottom of your print. Essential for strong, smooth surfaces.
- Z Seam Alignment: Controls where the printer starts and ends each layer, influencing the visibility of the "seam" on the print's surface.
Tip: A minimum of 2-3 walls and 4-5 top/bottom layers is a good starting point for most prints.
Infill Settings
- Infill Density: Controls how much material fills the inside of your print (percentage). Lower densities save material and time but reduce strength.
- Infill Pattern: Cura offers a variety of patterns like Grid, Lines, Concentric, Triangles, Gyroid, and Cubic. Each has different properties regarding strength, material usage, and print time. For example, Gyroid offers isotropic strength, while Grid is fast.
Tip: For purely aesthetic prints, 5-10% infill is often sufficient. For functional parts, consider 20-30% or higher with a strong pattern like Gyroid or Cubic.
Material Settings
- Printing Temperature: Crucial for proper filament melting and layer adhesion. Too low, and you get poor bonding; too high, and you risk stringing or oozing.
- Build Plate Temperature: Helps with adhesion and prevents warping, especially for materials like ABS or PETG.
- Flow: Adjusts the amount of material extruded. Fine-tuning this can eliminate under-extrusion or over-extrusion.
- Retraction: Prevents stringing during travel moves by pulling the filament back slightly into the nozzle. Settings include retraction distance and speed.
Tip: Always start with the filament manufacturer's recommended temperatures and fine-tune from there, especially after changing filament brands or types.
Speed Settings
- Print Speed: The overall speed at which the print head moves during extrusion. Higher speeds reduce print time but can decrease quality.
- Travel Speed: How fast the print head moves when not extruding. Faster travel can reduce stringing and overall print time.
- Initial Layer Speed: Often reduced to ensure proper bed adhesion.
Tip: Don't sacrifice quality for speed. Find a balance that works for your specific model and printer. Slow down for intricate details.
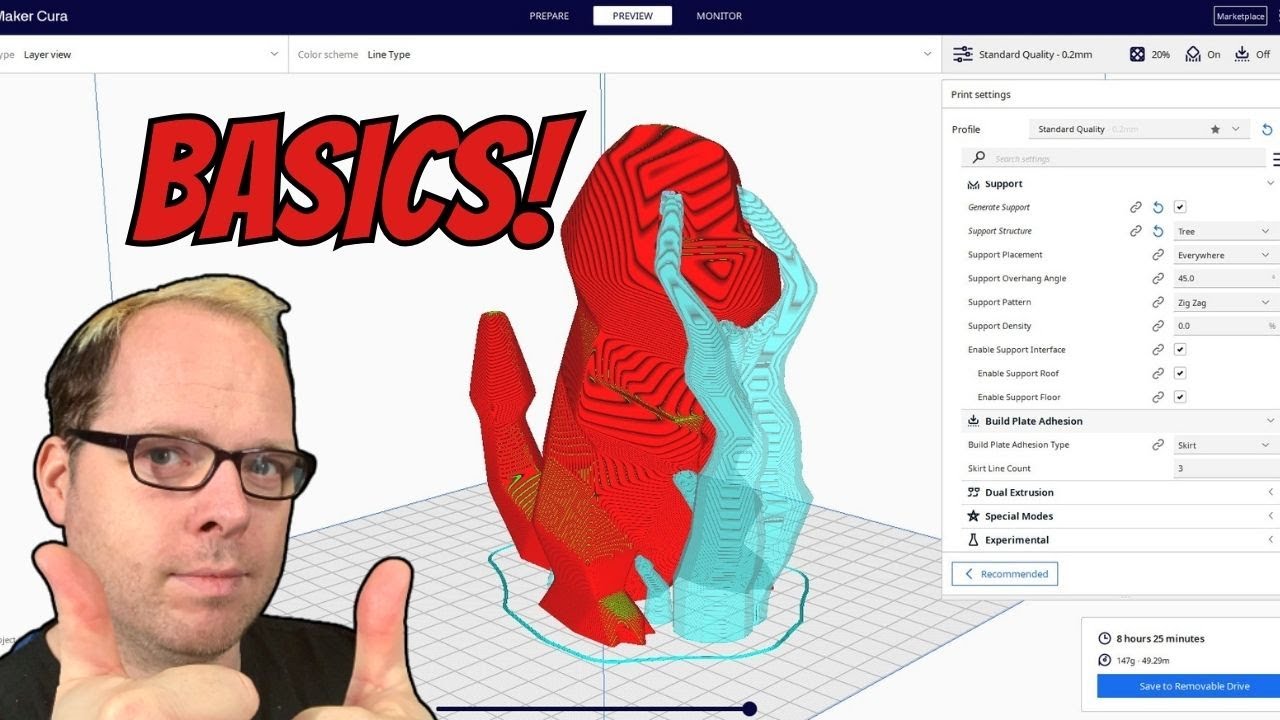
Support Settings
- Generate Support: Essential for models with overhangs that can't be printed in mid-air.
- Support Overhang Angle: Defines the angle at which support structures are needed.
- Support Pattern: Patterns like ZigZag, Lines, or Tree support (a highly efficient, branch-like support structure) influence ease of removal and material usage.
- Support Z Distance/X/Y Distance: Crucial for easy removal and good surface finish on supported areas.
Tip: Experiment with different support patterns and Z-distances to find the best balance between print success and ease of removal for your specific printer.
Build Plate Adhesion Settings
- Skirt: Draws a line around the object but doesn't touch it, priming the nozzle and helping to visualize the print area.
- Brim: Prints a single layer of lines radiating outwards from the first layer of your object, increasing its footprint on the build plate to prevent warping.
- Raft: Prints a disposable base layer underneath your object, providing maximum adhesion and a flat surface, especially useful for problematic materials.
Tip: Brim is a go-to for many users to prevent warping. Rafts are usually reserved for challenging prints or materials prone to adhesion issues.
Beyond the Basics: Advanced Features and Ecosystem
While the 400+ settings offer deep customization, **Cura Slicer** extends its capabilities through a vibrant ecosystem and continuous innovation:Plugins and Extensions
Cura boasts a rich Marketplace where users can download plugins to enhance functionality. These range from integrating third-party software to adding new print modes or material profiles. With new engine plugins introduced in versions like 5.5, users can further extend Cura's capabilities for highly specialized tasks, making it incredibly adaptable to niche requirements. This extensibility is a core reason why Why Cura Slicer is Your Go-To Open-Source 3D Printing Software for many professionals.
Optimized Algorithms and Continuous Improvement
UltiMaker and the community are constantly refining Cura's core. Recent versions have seen significant enhancements in slicing algorithms and print pathing, leading to faster, more reliable, and higher-quality prints. Features like optimized speed and intelligent travel moves directly contribute to these performance gains, ensuring that even with default settings, you're getting cutting-edge results.
Active Community and Support
The open-source nature of Cura means it benefits from a large, active community of users and developers. This collective effort ensures continuous updates, bug fixes, and compatibility with new hardware and operating systems. Access to forums, tutorials, and community-driven knowledge is an invaluable resource for troubleshooting and learning advanced techniques.
Actionable Tips for Mastering Cura Slicer
Navigating Cura's vast settings can seem daunting, but with a structured approach, you can quickly become proficient:- Start Simple: Begin with the "Recommended Mode" or well-established default profiles for your printer and filament. Achieve successful basic prints before diving into advanced settings.
- Change One Setting at a Time: When troubleshooting an issue or optimizing a print, alter only one setting at a time. This allows you to isolate the impact of each change.
- Understand Your Printer and Filament: Each 3D printer and filament brand/type has unique characteristics. What works for one setup might not work for another. Spend time learning your specific machine.
- Utilize Preview Mode: This often-underestimated feature allows you to visualize the print path, support structures, and infill pattern before printing. Catch potential issues, such as insufficient supports or unexpected travel moves, saving you time and filament.
- Consult the Community: Don't hesitate to seek advice from online forums, Reddit communities (like r/3Dprinting), or official UltiMaker support channels. Chances are, someone else has encountered and solved your problem.
- Experiment and Document: Keep a log of your print settings, noting successful outcomes and failures. This personal database will be invaluable for future reference and optimization.
- Update Regularly: UltiMaker frequently releases new versions of Cura with performance enhancements, bug fixes, and new features. Staying updated ensures you benefit from the latest improvements.